

Learn this Container Security Tool… 📦⚔️
A Project YOU can do...


Last Issue: Hacking Project 101: Reverse Shells with Netcat
Next Issue: AI Hacking Project: Atomic Red Team MCP
This Issue: Learn this Container Security Tool… 📦⚔️
“Two projects in one month. Not bad! Cyber Notes is my favourite newsletter!”
I can hear you all now say 📣
Jokes aside, I wanted to squeeze this one in before New Year. It will be slightly less “handholdy” than usual, but it sets you up with a practical understanding of Docker Scout and modern container security. Keep an eye out for the January project, AI Hacking Project: Atomic Red Team MCP. That one is going to be a standout.
There is no grand end goal today other than learning the tool and internalising the core concepts. By the end of this walkthrough, you will be able to:
• Understand how Docker Scout fits into a secure container pipeline
• Evaluate base image vulnerabilities and compare images effectively
• Integrate Scout into a GitHub Actions workflow for automated scanning
• Use gating policies to block releases
• Apply container security principles across your own projects
Docker Scout

At its core, Docker Scout is a container security solution that focuses on the software supply chain. Unlike other tools that simply grep a manifest file for versions, Scout digs into the SBOM (More on that here) to identify packages and match them against CVE databases.
It operates in two main modes:
Agentless Registry Scanning (Basically, they handle the compute and you don’t need to deploy anything into your registry): It hooks into your registries like Docker Hub, AWS ECR, etc. and analyses images “at rest.” It pulls metadata (not the full image) to monitor for new vulnerabilities in old images.
CI/CD & CLI (Active): A lightweight CLI tool that developers run locally or inside a pipeline to block builds before an image is ever pushed.
Features (Why You Should Give a Shit)
Chances are, if you read Cyber Notes, you either want to work in Cloud Security or already do. Below are the main ways I personally use Docker Scout at work, and I recommend you learn to employ it in the same way.
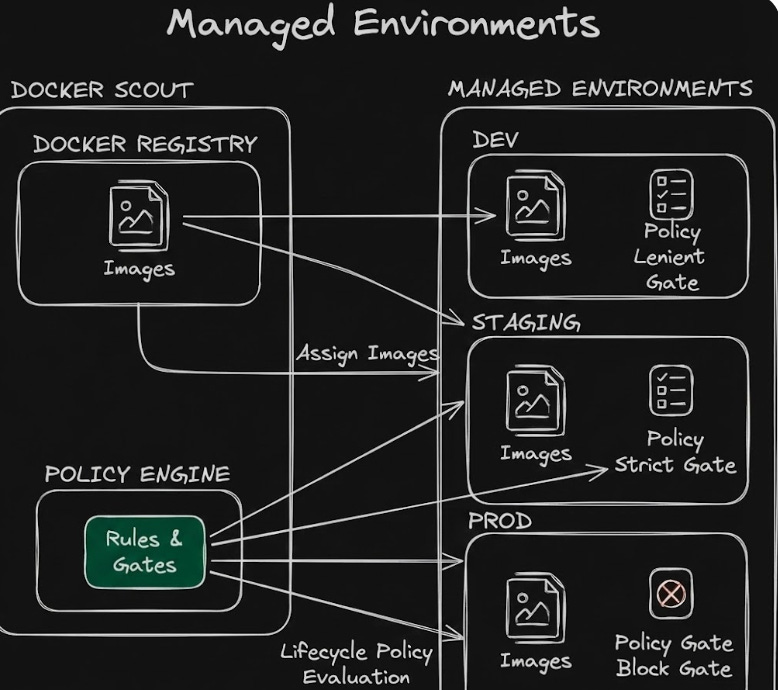
1. Managed Environments This is one of the standout features for organising policy. Instead of treating every image equally, you can assign images to specific “Environments” (Dev, Staging, Prod) - trust me, learn this.
Why it matters: It mirrors the label/tagging systems you might see in tools like Prisma Cloud or Port IO. It allows you to align vulnerability policies with your application lifecycle. You can be lenient in
Devbut strict inProd.
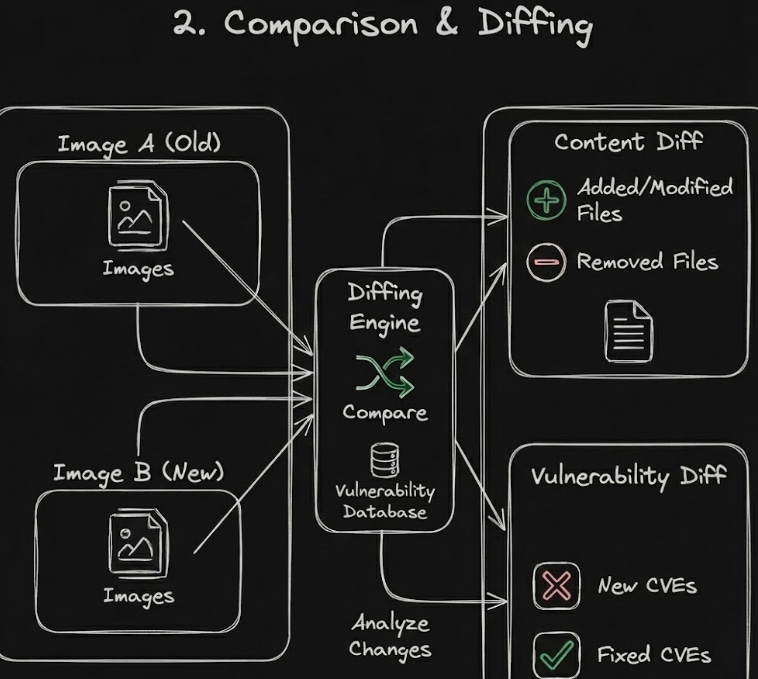
2. Comparison & Diffing Scout includes an experimental compare command. This allows you to diff two images to see exactly what changed, not just in terms of layers, but in terms of vulnerability posture.
Use case: “My build failed today but passed yesterday. What changed?”
3. Vulnerability Management & Exceptions Scout uses a pretty cool exception system (VEX) to handle false positives or accepted risks.
Scopes: You can scope exceptions to a specific image, a whole repository, or the entire organisation.
The Catch: From my testing, exceptions are metadata-heavy. If you scope an exception to a specific image digest, it won’t automatically propagate to a new tag of that image unless you scope it to the Repository or Organisation. It requires a deliberate strategy to ensure you aren’t re-ignoring the same CVE every week.
4. Developer Ecosystem Integration
SARIF Support: It outputs results in
.sarifformat, making it easy to upload findings directly into GitHub Advanced Security or other dashboards.Policy Gating: You can define thresholds (“Block on Critical”) to break the build if criteria aren’t met.
How To
There is no grand end goal today other than internalising the core concepts. Below is the practical workflow I used to get up and running.
1. Authenticate & Setup
First, you need to authenticate your local Docker CLI with your Scout organisation.
Open the Docker Dashboard locally and navigate to the Scout tab > Sign in.
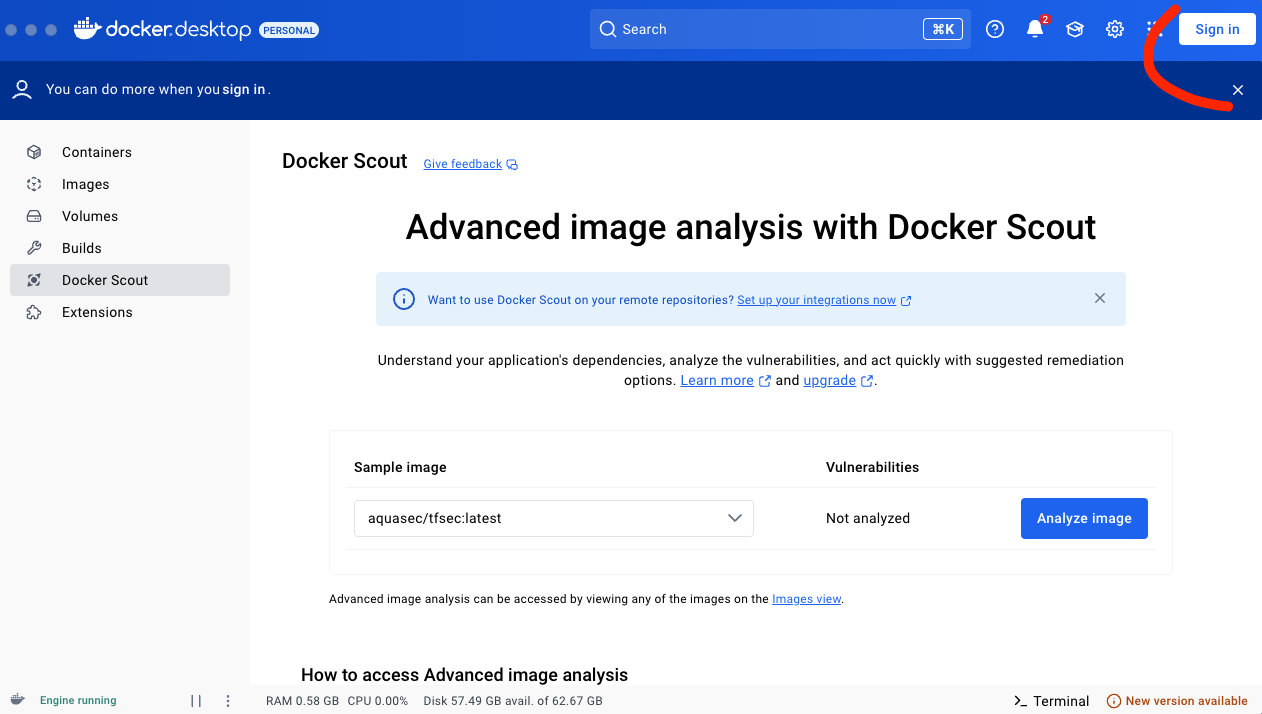
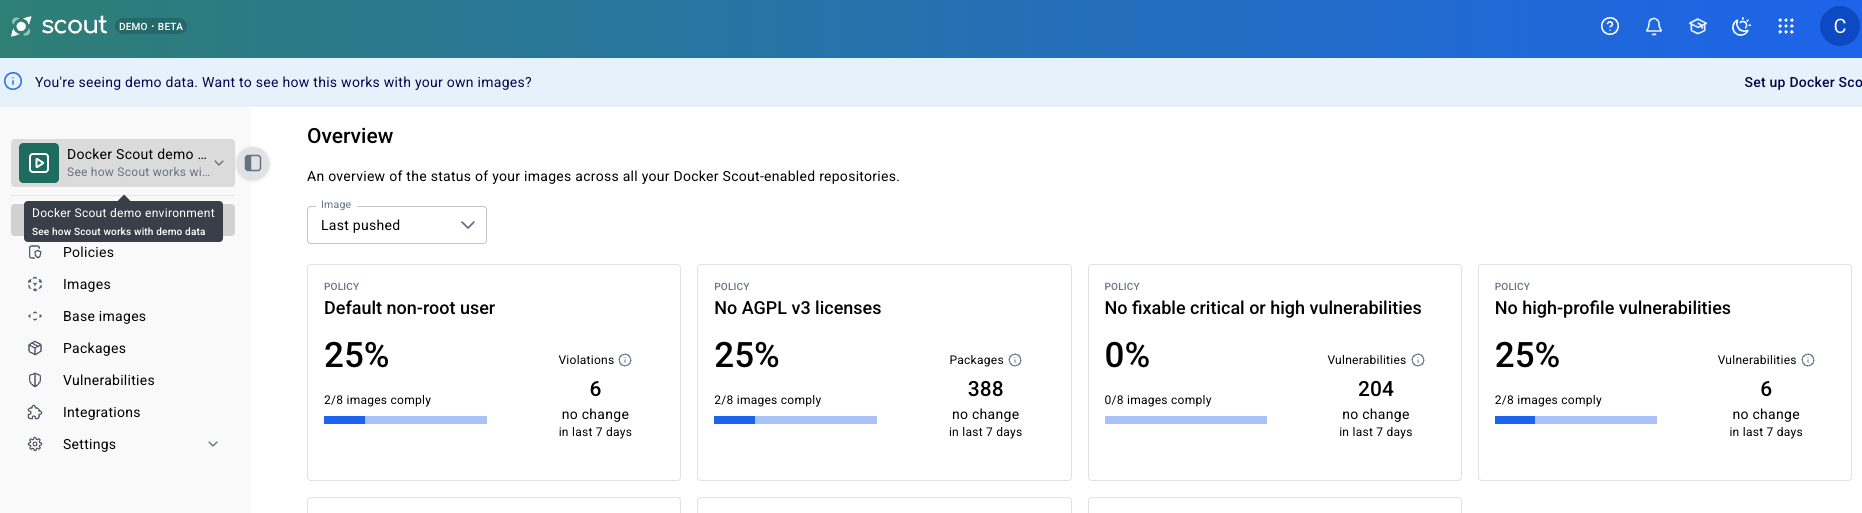
You’ll be taken to the Scout onboarding page.
Go through it all, or open the demo version if you don’t have your own registry yet

From the account settings page you can now create a personal access token which you should use to auth from the CLI, like so:
docker login -u <YOUR_ORG_USER>
# Enter PAT Token as password
2. Local Scanning
Before you even push your image, you can run a quick scan. This is great for “shifting left” without leaving the terminal.
Basic CVE Scan: I will use the Juice Shop image here
docker scout cves bkimminich/juice-shop:latest
Pretty easy right?
Simulate a Gate: You can run the command with arguments that mirror your build pipeline gates to see if you would pass or fail.
docker scout cves bkimminich/juice-shop:latest --only-severity critical,high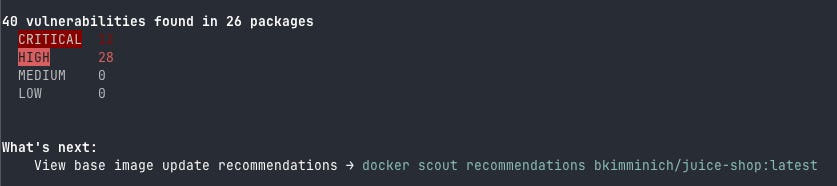
3. Working with Managed Environments
This was the most interesting part of the basics. You don’t just push images, you assign them to a stage in your lifecycle.
Assigning an image to ‘Dev’:
docker scout environment dev cybernotes-org/bkimminich/juice-shop:latest --platform linux/arm64Remember, this ^ is what we would expect when using these tools in an actual company.
3. Next Steps for You
Fix the easy stuff: Run
docker scout recommendations <image>. It will tell you if simply swapping the base image (fromnode:16tonode:16-alpine) will instantly kill 50% of your CVEs.Spot the Difference Challenge: Push a new version of an image and use the experimental comparison command:
docker scout compare <new-image> --to <old-image>This is the fastest way to answer your dev teams question question: “We didn’t change the code, so why is security flagging it now?”Add it to GitHub: If you have a test repository, add the
docker/scout-actionto your workflow yaml. Seeing the security report appear automatically in your Pull Request comments is usually the moment the tool “clicks” for developers.
Hopefully you’ve seen how simple it is to get up and running with image security and Docker Scout 🐋
WJPearce - Cyber Notes
Enjoyed this? Why not check out my other reads…