

A Weekend Cloud Project ☁️
Host your own static website

Welcome to all our new readers! 👋
This week, we've reached a major milestone with over 1000 subscribers! 🎉 A huge thank you to everyone for your incredible support.
So how would you go about hosting your own static website on AWS?
This really is one of those projects where we can get as extensive as we like taking it from a real entry-level project to something really advanced, introducing different services and deployment methods.
We are going to use two basic AWS Services for this project:
S3: A Highly scalable object storage service designed to store and retrieve any amount of data from anywhere on the web.
Route 53: Domain Name System (DNS) web service designed to route end users to Internet applications by translating human-readable domain names into IP addresses.
Let’s get into it:
It goes without saying but you’re going to need a free AWS account for this: After you’ve signed up there is a basic checklist of security and best practices items you should address:
1. Enable MFA (Multi-Factor Authentication):
Enable MFA for the AWS root account
2. Create an IAM User:
Avoid using the root account for daily tasks.
3. Set Strong Password Policies:
Implement password policies to enforce strong passwords for IAM users.
4. Set a billing alert:
This can be whatever you like but I have mine set to email me if costs for the month go above $20
Create a Domain Name
Navigate to the Route 53 Service from the Console Home page and select register domain.
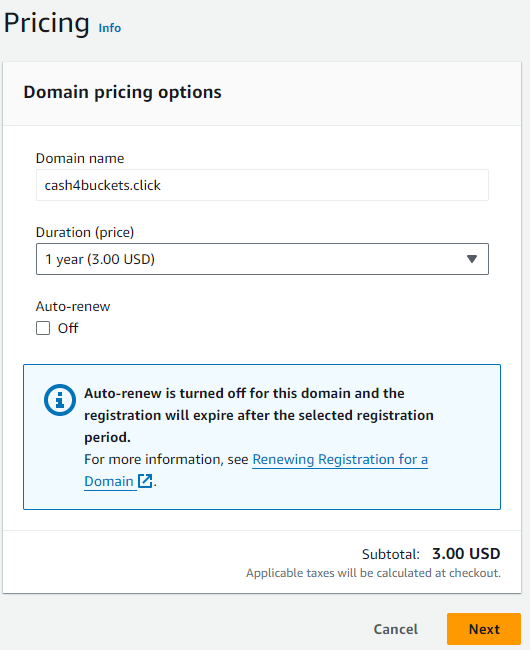
Here you can choose any domain you want and add it to your cart. I’ve gone with cash4buckets.click - .click because it’s cheap! Remember to un-check Auto-Renew, unless you want that on.
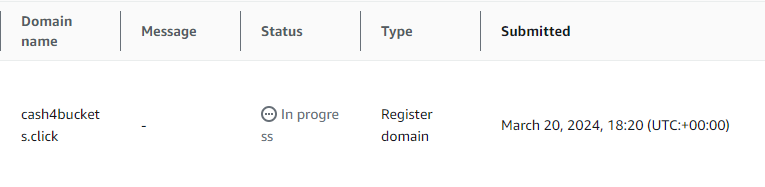
Your domain will now officially register - you can go and grab a brew here while you wait for the status to say Successful!
Create an S3 Bucket
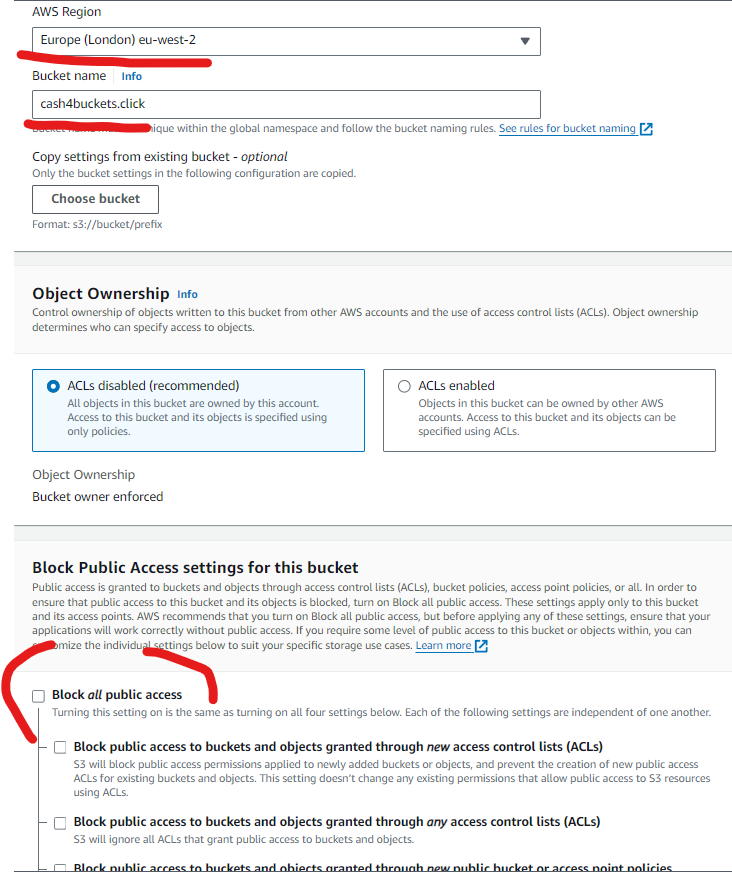
Navigate to S3 and hit “create bucket“ - give your bucket the same name as your domain “cash4buckets.click“ and select a region near you. Next, we need to un-check Block all public access, which is on by default. Leave everything else on this page as default - although it’s worth spending time understanding the options, especially KMS keys 😉 Your page should now look like this:
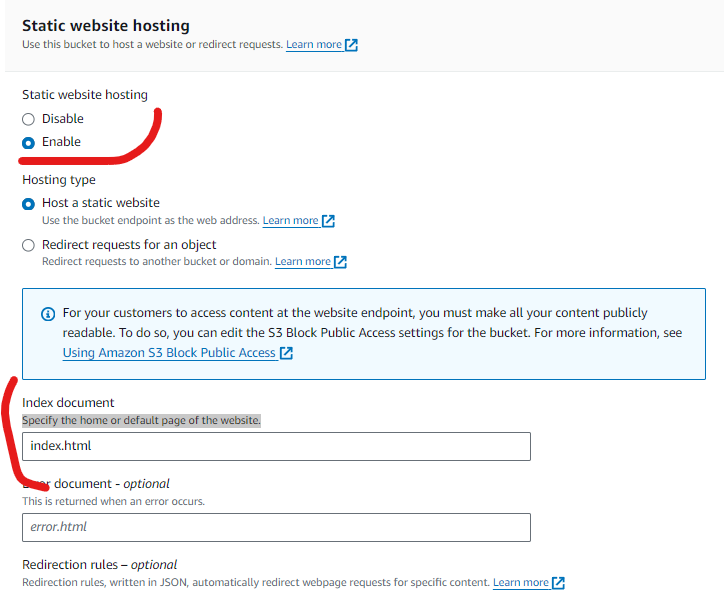
Enable Hosting + Upload your files
Now you’ve created your bucket and domain we need to enable static website hosting. This can be configured at the bottom of the “properties” tab on your main bucket page. Select “Enable” and type “index.html” in the Index document box - “Specify the home or default page of the website.”
We can now upload our index.html file. This step is really easy, on your buckets main page hit the orange button that says “upload” and drag your index file in - this is just a text document with your HTML and the .HTML extension, here’s mine:
<!DOCTYPE html>
<html lang="en">
<head>
    <meta charset="UTF-8">
    <meta name="viewport" content="width=device-width, initial-scale=1.0">
    <title>Sell Your Buckets Now!</title>
</head>
<body>
    <div style="text-align: center; font-size: 24px; font-weight: bold;">
        Sell all your buckets now! Any condition - we buy em all!
    </div>
</body>
</html>
Just a quick note: When we refer to "static" in the context of hosting a website on S3, it doesn't imply that the site lacks any dynamic elements. Rather, it signifies the absence of server-side backend code. Therefore, you can still incorporate JavaScript into your site for enhanced functionality.
Configure Bucket
We now need to add a bucket policy, under the permissions - select edit and paste this JSON in, replacing the Resource with your bucket ARN:
{
    "Version": "2012-10-17",
    "Statement": [
        {
            "Effect": "Allow",
            "Principal": "*",
            "Action": "s3:GetObject",
            "Resource": "arn:aws:s3:::cash4buckets.click/*"
        }
    ]
}
Configure Route 53
Almost there! We’ve just got to redirect cash4buckets.click to our S3 bucket.
Back in Route 53, select your hosted zone and “Create Record” you might have to click “Switch to wizard” here to get the Routing policies to show. Go ahead with “Simple routing”, seriously, it’s worth stopping here and reading them all if you’re studying towards the AWS SAA exam.

We are now given the option to Define a Simple Record. Populate these three boxes - Alias to S3, your region and the S3 service, like so:
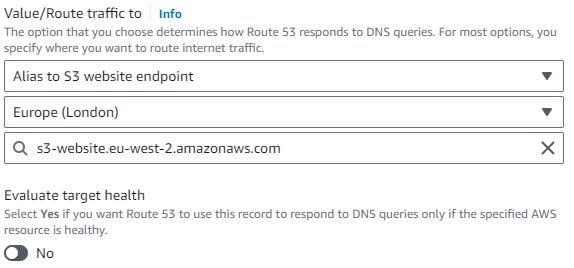
Finally, press Define Simple Record
Congrats!🎉
Now when we visit cash4buckets.click in our browser, our website appears - it really is that simple!

Now you’ve got the basics down why not take it to the next level and add in a CloudFront distribution, securing the connection with SSL using AWS ACM (Amazon Certificate Manager) to enable HTTPS access.
Okay, but how?
My eBook - It includes several cloud projects designed to sharpen your cloud skills and elevate your career

“A Practical Breakdown: Understanding Cloud & Security with simple Projects you can do at home.”
Thank you for reading: Keep it secure, keep it light-hearted!
WJPearce - CyberBrew